Tuesday, 6 November 2012

So this happened...again

So after successfully painting bedroom number 2 (known as the Yeti Room - it's all white...like a Yeti?!) from top to bottom, I wasted no time in moving over to bedroom number 1, the smallest of the three bedrooms. Bedroom number 1 is the Blue Room, or as I have now declared it the Blue Room from HELL. The HELL room, although the smallest, has been the most work so far. The room just seemed to emit dirt, and there was no shortage of black dog hairs painted into the trim. The walls were a very heavy and semi-glossy blue with lots of lumps and bumps which required sanding, 3 coats of primer and 3 coats of paint-primer in one. The ceiling also needed a refresher, as there were dirty patches, scuff marks and other little spots that I couldn't live with. Painting the ceiling in the Yeti room was my first ceiling painting experience and it went incredibly well, it was completely done in two days (one coat per day). I never imagined the Blue Room from HELL would be any different...I was so wrong!
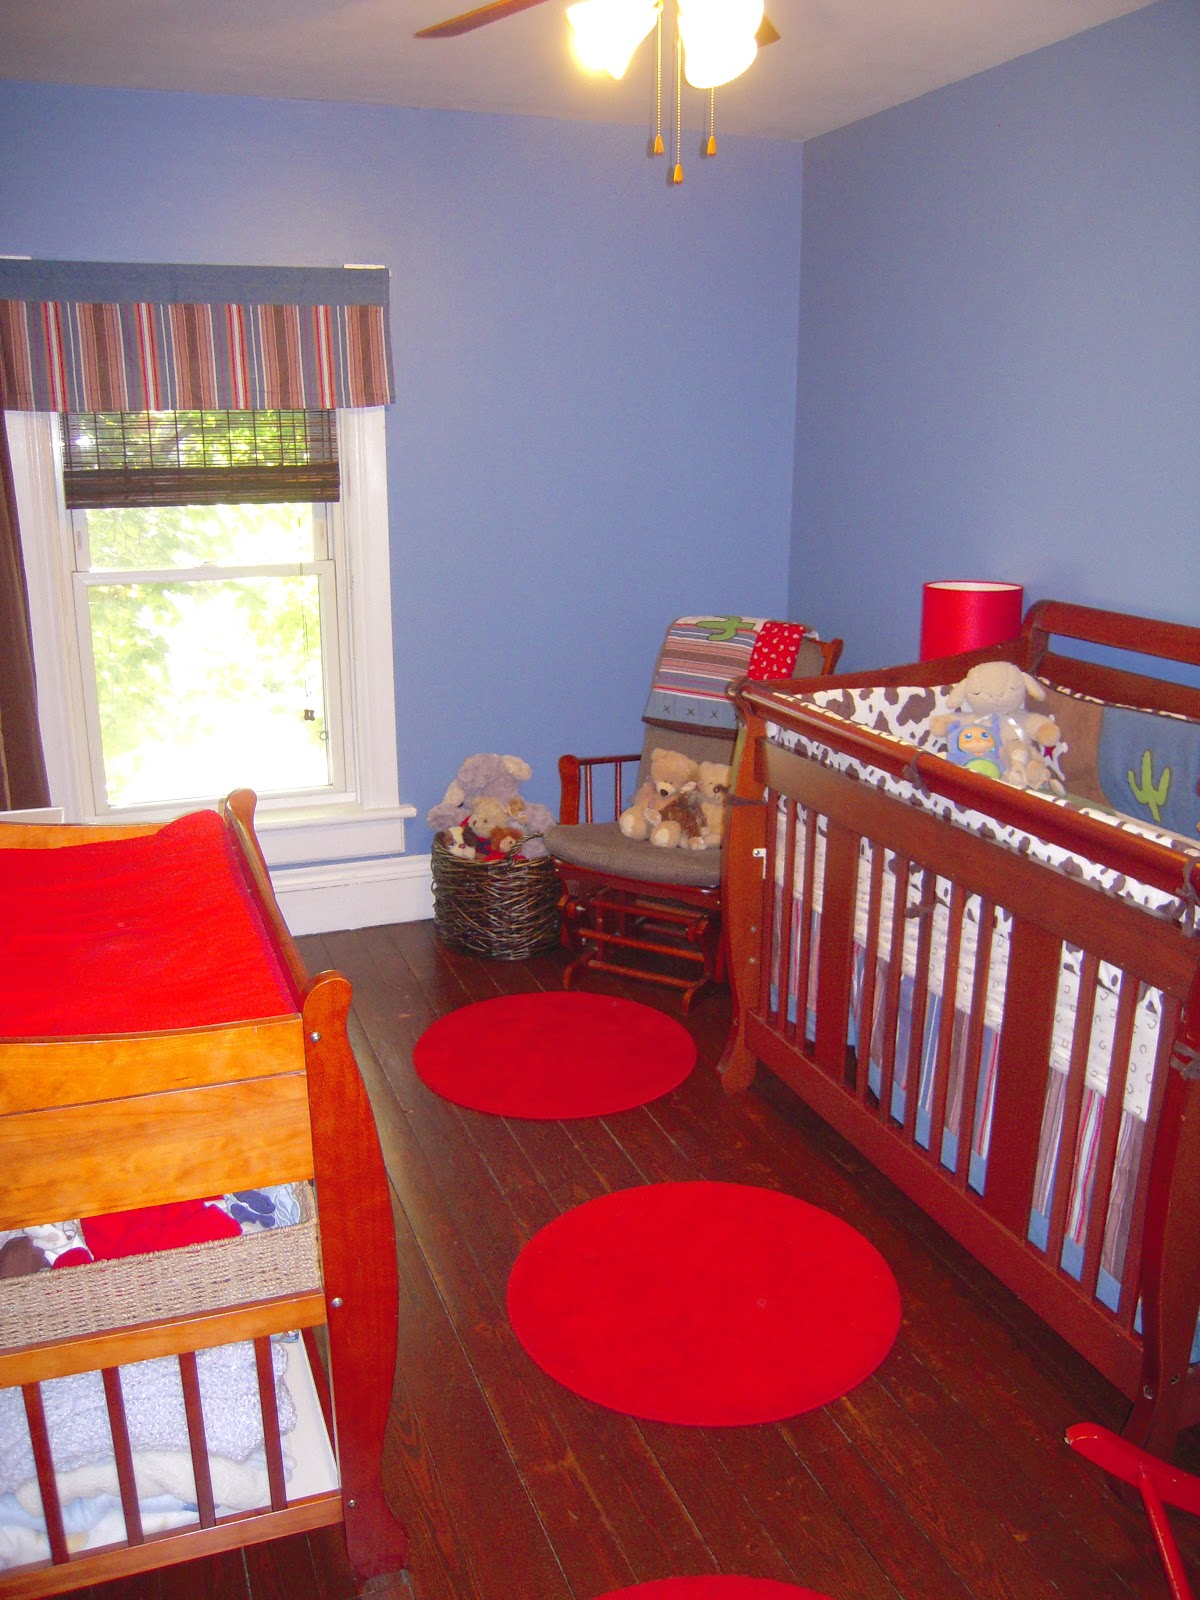

This is the Blue Room from HELL on home inspection day - not our baby furniture/decor. The blue is darker than it looks in this photo. (Side note: one of the red rugs was strategically placed to cover a missing chunk of hardwood floor).

I was only half way into painting the first coat on the ceiling in HELL room when I noticed a strip of paint literally peeled off the ceiling and stuck to the roller. Initially I thought I perhaps hit one of the hairline cracks in the ceiling with too much paint on the roller. I moved away from that patchy spot and kept going on the rest of the ceiling. Shortly after, the edges of the wonky patch started to curl and droop and a few other patches around hairline cracks started to peel away. I stopped what I was doing, packed up for the day and let the paint dry out. I cut away at the pieces that were hanging down, sanded the edges smooth and figured all I needed was to plaster in the wonky bits, sand and paint over the smooth, clean surface. 

The sanding/filling process took longer than expected because there was a full week of rain and the house was a bit too damp to mess with...I also had a sore back/neck/shoulder situation happening (which has not gone away), so I figured I would give the room a break - frustrating since I had expected to have the room complete long ago! Today I got back to it, the ceiling was sanded smooth and ready to go. I had painted nearly the entire ceiling when it happened....again! Only this time it seems to be worse, the peeling patch is far bigger.


This is a piece of paint that just peeled away from the plaster ceiling.

I have done some Googling to try and figure out what is up and I think I have found it...I don't want this to be true, because it will result in even more work to correct, and may be an issue in the other rooms of the house...but the culprit may be something called calcimine paint (say in scary voice). It seems calcimine paint was used frequently in older homes (we are talking early 1900's), it was a fast, cheap and easy way to give a fresh clean surface to plaster ceilings and walls. The calcimine paint did not have much in the way of binders, and over time the paint just fails, chipping and peeling away. Trying to paint over a surface that has a calcimine base with new latex paint just makes things worse, the weight and dampness of the new paint just pulls the base paint down. I still don't want this to be true, but I see no other reason for this issue or any evidence of something else like a leak in the roof. It seems the two options I have are to strip the entire ceiling or just do a patch treatment in the bad/peeling areas. Either way the process involves getting rid of the calcimine layer (scraping/sanding/using a special wash etc.), prepping the ceiling with a calcimine coater or oil based primer, and filling in any uneven areas with a non-water based filler, then painting. Since HELL room has already eaten up more time than I expected, I will just have to power through. Another trip to Home Depot to see if I can get what I need and away I go. Fingers crossed the issue can be resolved easily and soon! The dining room is next on the schedule, but since the ceiling in that room already looks questionable, I have a feeling I am in for even more calcimine ceiling paint nightmares. I knew there would be surprises with an old house, but this one came at me out of no where - painting should be the easy part, right?!


Monday, 5 November 2012

New furniture and a crabby cat

For the new house we definitely needed some new furniture. Before moving we found a couch we liked at a shop in Toronto, ordered it and arranged for delivery just a week or so after we got into the house. It was a bit of an epic ordeal and I am NOT on speaking terms with the furniture shop we got the couch from (to spare myself any more headaches I will not go into detail, but buying a couch should NOT be that difficult!). After the couch fiasco I moved on to work on other things in the home, I just couldn't stand to think about shopping for any major pieces of furniture, but we knew we needed more than just one couch and an old arm chair!
It took some searching, but we finally decided on two chairs and a footstool from Ikea. The chairs themselves were huge and really comfy but the slip cover selection was lacking. Instead of just settling on a cover I didn't really like, I started looking into other possibilities, such as buying a plain white cotton cover and dying it - I very quickly decided it would be a waste of time, money and the process and outcome could be extremely risky. I remembered spotting a company that made different legs for Ikea couches and chairs (gorgeous but WAY out of my league price-wise) and thought perhaps there is somewhere out there that also makes replacement covers...as it turns out there is a furniture god! I found a company called Bemz, they specialize in making covers for Ikea furniture in a huge range of fabrics - they even make covers for items Ikea has discontinued! I immediately sent for some fabric samples and as soon as they arrived I had made my decision and ordered two chair covers and the matching footstool cover for the items I had my eye on at Ikea. I also ordered a new cover for a chair I had bought some 5+ years ago from Ikea, the chair I picked up at a great price because it was discontinued but it came with a cover I was not so in love with. As the covers take approximately 4 weeks to ship, we waited until the covers arrived to buy the chairs and I am glad we did! This past Saturday my friend/superhero Holly took us to Ikea in her dad's truck so we could get the chairs and footstool while they had them in stock AND while there was a super sale on! Buy any one fabric sofa or arm chair and get the second 50% off! As soon as we got the furniture home, we put everything together - what a difference it has made to the place! The front room, which looked so sad and empty before is now cozy and livable and the TV room now has more comfortable seating.


Buster next to the new chair...he is suspicious!

Overall I am pleased...but the cat...that is another story! As it turns out, Buster aka Little Man, does not like change! There was a footstool positioned at the front window for him so he could watch the world go by. It took him a while until he accepted that footstool and actually perched his bum on it. Yesterday I went and relocated the old footstool to a window with a less interesting view, but put the brand new HUGE cushy footstool in the front window for him. So far Buster refuses to touch the new footstool. I have found him sitting on his old footstool with a miserable pout on his face. I have faith he will come around eventually, but never imagined a cat would be so set in his ways!


Buster sitting on his good ol' gold vinyl stool, not ready to accept his cushy red throne!


Friday, 2 November 2012

It's about time!

It's about time! I have been wanting to put a little something together to document some of the major changes that have happened to me this past year - better late than never! But where do I begin?!

I'll take a step back to early 2012, February. It was then that after three years of being in a relationship, I got engaged! So, yes, there is a wedding to plan, but I don't expect to go into too much detail about the planning of the big day here (as it turns out I am NOT the wedding planning type!). When I should have started looking into the wedding business, both myself and the man (Jeremiah) started looking at houses instead. We were both sick of living in the city, he is a country boy, and I had just had my fill of what the city had to offer (high cost of living, crowded public transit, pushy people, pollution...and the list goes on!). After a fair amount of looking at house listings but never actually making the move to even view a home, we just went for it - contacted an agent about a nice looking house, rented a car and off we went to see a few properties. The first house we saw was the one! A 100 year old red brick house, number 442! Everything that happened in the weeks following is a bit of a blur. Being a first time home buyer is not for the faint of heart! Fast forward to July 9th 2012 and that house was all ours! I was finishing a contract at work, and I was stuck with my apartment in Toronto for an extra month, so I did not officially move in until August 1st (Jeremiah, had not moved in yet either, he was staying locally - at my mums - to cut down on the commute to his new job). The first week of August marked when the real fun began!


We knew that we were getting into an older home and there was work to be done, but thankfully nothing too major - but we were still in for some surprises! Since August, my focus has been working on the house, cleaning, doing minor repairs, cleaning, painting, cleaning, decorating and furnishing... and more cleaning (I try not to dwell on how filthy the place was when we moved in, but its hard!). In fact I  had been so focused that I didn't stop to really document what we were accomplishing. There are a handful of "before" photos and so far not too many "afters", but I am working on that. The goal is to have the majority of the inside of the house done by the end of this year and with the help we have received from family and friends, I think we can do it! The garden will be waiting until next year and in the future there are definitely some more major jobs that will take place.

I suppose that sums it up for now! As more work gets done and changes take place I will do my best to post what I can - since this is our first house (and my first blog) I expect the unexpected and will share my adventures with you!